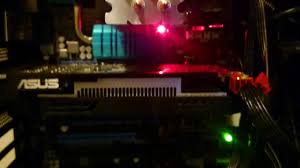
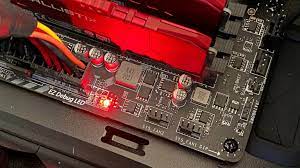
Red Light on Motherboard (Causes, Solutions, Fixes)
Dealing with a red light on the motherboard can be a nightmare for users. A motherboard does not exist alone; it is connected to other internal components.
However, red light on the motherboard might indicate faulty hardware or other technical problems. It might often be difficult to identify the hardware that prompts the red light on the motherboard. Unlike older motherboards, newer motherboards include LED indicators for each main component. Because older motherboards only have one LED indicator, determining the source of the problem might be difficult. As a result, it is always a good idea to peruse the motherboard's user manual for in-depth understanding.
Therefore, in this article, you will clearly understand the causes of the red light on your motherboard and how to fix them effortlessly.
Understanding the Red Light on the Motherboard
Depending on where the red light on the motherboard is located, the light serves various functions. Similarly, another factor to consider while understanding red light on the motherboard is the model and intended use of the motherboard. Some red lights indicate that some components have not started operation.
In this situation, the red light will turn off as soon as all components are turned on. It's worth noting that some red lights are valuable in indicating areas that require immediate attention.
There are also numerous light color signals for different purposes. It's crucial, however, to grasp what each color's blinking and breathing means.
Now that you know what a red light on the motherboard means let's look at each hardware red light signal and how to fix it.
What the Red Light on a Motherboard Means (And How to Fix It)
A red light on a motherboard, as previously said, signifies that there is a problem. Because the motherboard includes built-in functions, the LED indicators are the sole means to notify anomalies. As a result, technological advancements have made it easier to diagnose and resolve errors.
You should now be aware that a motherboard can display a red light for various reasons. Let's take a closer look at each component and resolve any red light indicator issues that may arise.
Connected Hardware Errors
During the boot process, certain LED indicator lights display the status of the essential components. CPU, RAM, GPU, and BOOT are the key parts.
CPU (Central Processing Unit)
The CPU's red light can signify a variety of issues. The system may not even start up because of the CPU problem. Some of the potential problems with this CPU situation include:
- Verify that the CPU's connection to the socket and power connector is secure.
- Check the fan since a lack of air caused by a malfunctioning fan might harm the motherboard.
- Drained CMOS battery that should power the BIOS (basic input/output system) system's firmware.
- The CPU is faulty.
RAM (Random Access Memory)
The red light blinking at the RAM position indicates that the RAM is dusty, incorrectly fixed, or corrupted.
To fix this issue, remove the RAM chip from the clip, clean it with a dry towel, and refix the RAM into its right component. Ensure you hear the clicking sound of the two end clamps for each RAM slot while installing the RAM. The red light signal should stop after reinstalling the RAM. If the red light remains on, the RAM may need to be replaced.
GPU (Graphics Processing Unit)
This situation is comparable to that of RAM. Any light indicator in this place indicates that the video card was installed incorrectly or has become corrupted due to usage. The GPU can collapse due to some causes, which are overclocking, a faulty power supply, and overheating.
To fix GPU-related led light issues, check that the GPU is correctly fixed before repairing it. To clean the dust, wipe the GPU chip with a soft dry cloth. Check for any loosened parts in the connections as well. If the light is still on after troubleshooting, it implies the GPU is corrupt.
BOOT Device Error
Another challenging motherboard issue is the red light indicator around the BOOT location. BOOT devices are hard drives, floppy disk drives, CD-ROM drives, DVD drives, and USB jump drives. The LED blinks whenever the motherboard fails to recognize the boot devices. It's possible the boot device has become corrupted or is improperly installed.
Check the power connections and main plug of the computer to resolve the problem. If the problem persists, the boot device is likely to have become corrupted. Examine any loose connections as well.
Motherboard's Self Test
Faulty signals identified by inbuilt POST checks (Power-On-Self-Test) can also indicate a red light on the motherboard. This check method is displayed on every computer at the point of the boot. This POST check involves ensuring that the CPU, hard disks, and CPU are all operational. When a problem is detected on any device, the POST notifies the user by showing text, red LED light indicators, and loud sounds.
However, consult the board's user handbook to figure out which of the devices is having the problem.
How to Fix the Red light errors on the motherboard?
You can use the methods listed below to fix red light errors on both older and newer motherboards. Before connecting or detaching any hardware, ensure the system is turned off, and the power is set to zero.
Reset the BIOS of the motherboard
There are two approaches to reset the BIOS. The first step is to remove the CMOS battery and wait five minutes before plugging it back in. The CMOS jumper is another technique to reset the BIOS.
This three-pin jumper is positioned on the CMOS battery's side. Typically, you may locate the pin on one of the two pins. Connect the jumper to the other two pins for five minutes before reconnecting it to its original location. In addition, you'll need the board's user manual to complete this step meticulously.
Disconnect Hardware
It is critical to unplug the hardware for a rigorous assessment. Clean the motherboard after disconnecting the devices to ensure there is no dirt on it. After that, double-check all of your hardware to ensure it's in good working order. If any of the pins are bent, carefully adjust them using a tweezer or screwdriver.
Change the CMOS Battery
If the red light continues to flash after restarting the BIOS, the CMOS is drained. Then you should replace the CMOS.
Check and Change Storage Devices
This method is a check-and-confirm method of troubleshooting. This entails removing all storage devices. Then restart the computer to see whether the booting time has improved. To confirm if the computer has started working, try connecting the devices one time until you find the one causing the problem.
Check Your Power Supply
If the power connection is faulty, the system may have trouble booting. If you notice any issue with the power source, replace the connection. With a low power supply, motherboards can still function properly. However, in the case of a high supply, the motherboard and its components may be affected.
What Does a Solid Red Light Indicate on the Motherboard?
A solid red light on the motherboard indicates a problem with one of the system's components. It also indicates that the motherboard needs to be replaced. Check all components and look for the LED indicator to figure out where the problem is on the motherboard.
How Do I Test if My Motherboard Is Working?
The system's battery may be flat. Turn off the system and plug in the charger. If the system boots up, the motherboard is still in good working order. If the system fails to boot, wait for the BIOS to perform a Power On Self Test. The POST will offer you a hint as to what is going on.
Post a comment